Growing hops at home

Centennial hops ready to harvest

Hop plant in April
Growing hops at home is extraordinarily fun. The shoots emerge from the ground in early spring and grow very rapidly until the cones (flowers) are harvested in August and September. Commercially, they are grown on 18 foot trellis systems, but the bines (technically not vines) can grow much higher. There are well over 100 known varieties, each with unique characteristics of aroma, flavor, bitterness level, and degrees of susceptibility to disease and insects. The world's historical beer brewing regions of England, Germany, Belgium, and North America all have specific hop varieties which are important in defining beer styles. In the United States, Washington, Oregon, and Idaho are the biggest producing states, although more and more growers are appearing on the scene to meet the increasing demand of craft brewers trying to keep up with the skyrocketing popularity of hop-forward styles like India Pale Ale (IPA). There are three conventional ways hops are used in brewing: early in the boil to add bitterness, mid to late boil to add flavor, and post fermentation 'dry hopping' to add aroma. A good brewer will carefully choose hop varieties to complement the malt characteristics of the recipe and fine tune the process to create something delicious.

Hop plant in August on 12 foot bamboo trellis
I've grown multiple varieties in the past, but this year I planted Centennial in the backyard. Centennial has a fairly substantial grapefruit and somewhat candy-like sweet aroma which I've heard compared to fruit loops cereal, along with medium bittering potential. One of the best known beers brewed with this hop is Bell's Two Hearted Ale. If you will be brewing with your own hops, it’s important to get your rhizomes from a source that can guarantee the variety. Many home brewing supply shops will sell them in early spring and they are also available by online order. I got my rhizome at the local nursery, which had a large selection of desirable varieties. Professional growers have told me that it takes three years for plants to reach maturity, where the root system is established and the harvest amount reaches full potential. I was pleasantly surprised that my first year plant produced more cones than I expected. Like anything, doing some research is recommended to ensure the plants are happy. My top two resources have been The Homebrewer's Garden (Joe Fisher and Dennis Fisher) and Homegrown Hops (David R. Beach). I also recommend Fresh Hops and Left Fields Hops for ordering online and for good information about hop growing.
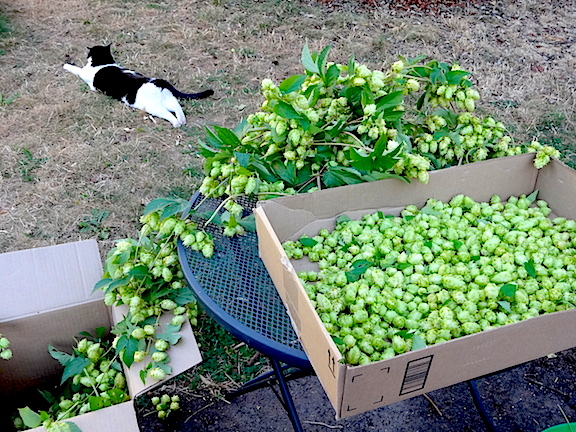
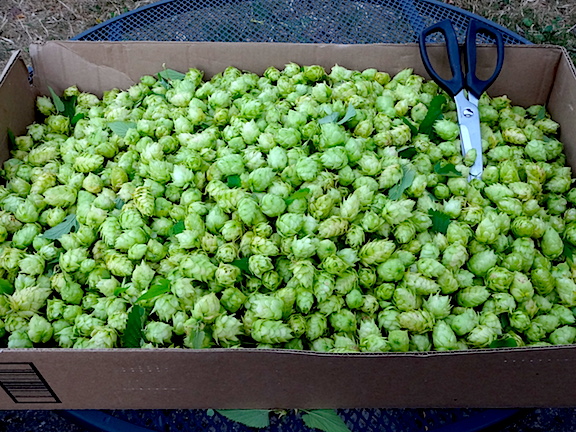
Harvested August 28
This year I harvested on August 28. One of the most challenging and important skills involves learning how to judge peak ripeness. Pick too early and the hops are grassy, vegetal, and have low flavor and bittering qualities. Pick too late and skunky, oniony aromas appear. Fresh hops are fragile and need to be used (in the highly seasonal 'wet hop' or 'fresh hop' beers) or dried immediately. I used a door screen propped on some boxes with a fan blowing over them. If the humidity is low, they will dry in a few days, but I usually finish drying in a dehydrator at its lowest temperature setting for several hours. Then the hops are vacuum sealed and frozen, as warm temperature and oxygen are the top causes of deterioration. This year the final yield was 396 grams of dried hops. The amount needed for one batch of beer depends on the style, but I expect to get about 5 - 10 batches out of the 2016 harvest. The tricky part is not knowing the exact alpha acid content (bittering potential, which is given on commercially grown hops) so it takes some experimentation to dial in the recipe and process using homegrown hops.
I would encourage anyone interested to try growing your own hops. You can ask around to find out which varieties do well locally, although Cascade is one that is known to be very hardy. The best-known beer with Cascade hops is Sierra Nevada pale ale. For non-brewers, hops can be used to make tea or a hop pillow since they contain compounds that make you sleepy. And a little bit of online research will give you some ideas on how to use hops as a cooking ingredient. I also need to mention that hops are very toxic to dogs (and likely cats) and there are numerous accounts of sad endings from homebrewers who found this out too late. Please be careful. Never give beer to dogs.
Hops ready to dry
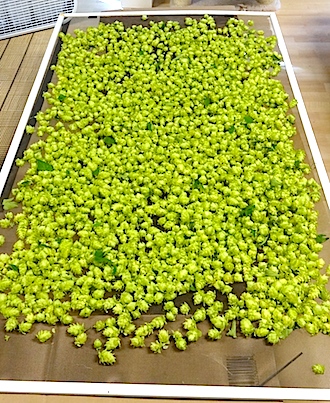
Hops drying