How to improvise with nabe (Japanese hot pot)
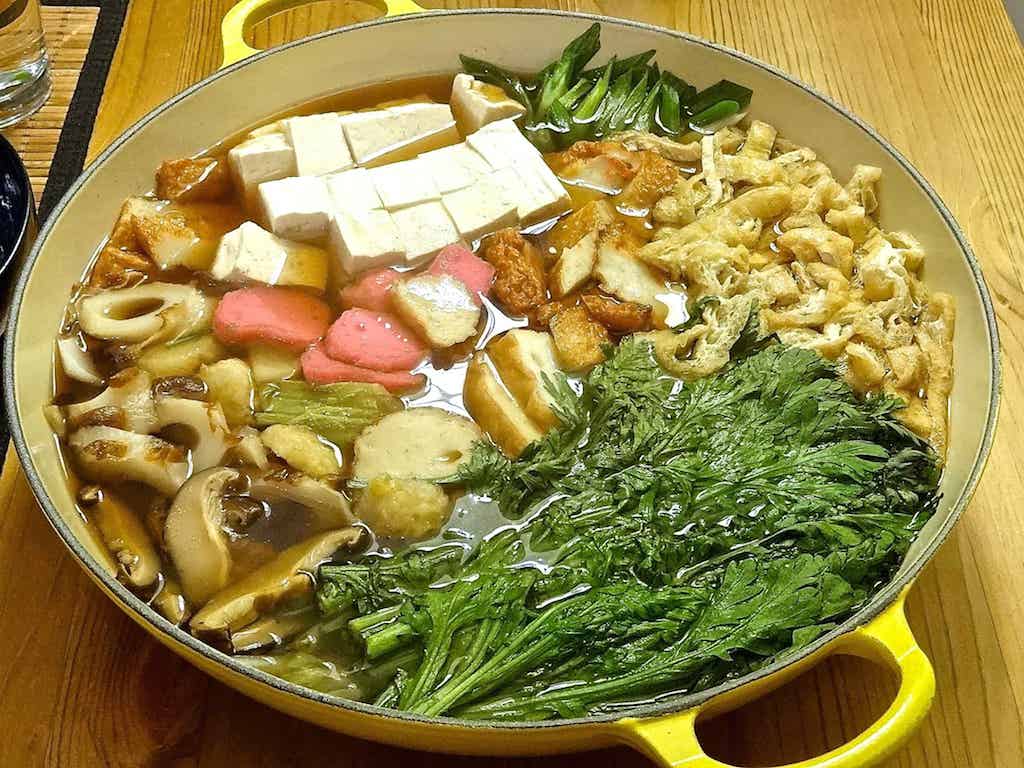
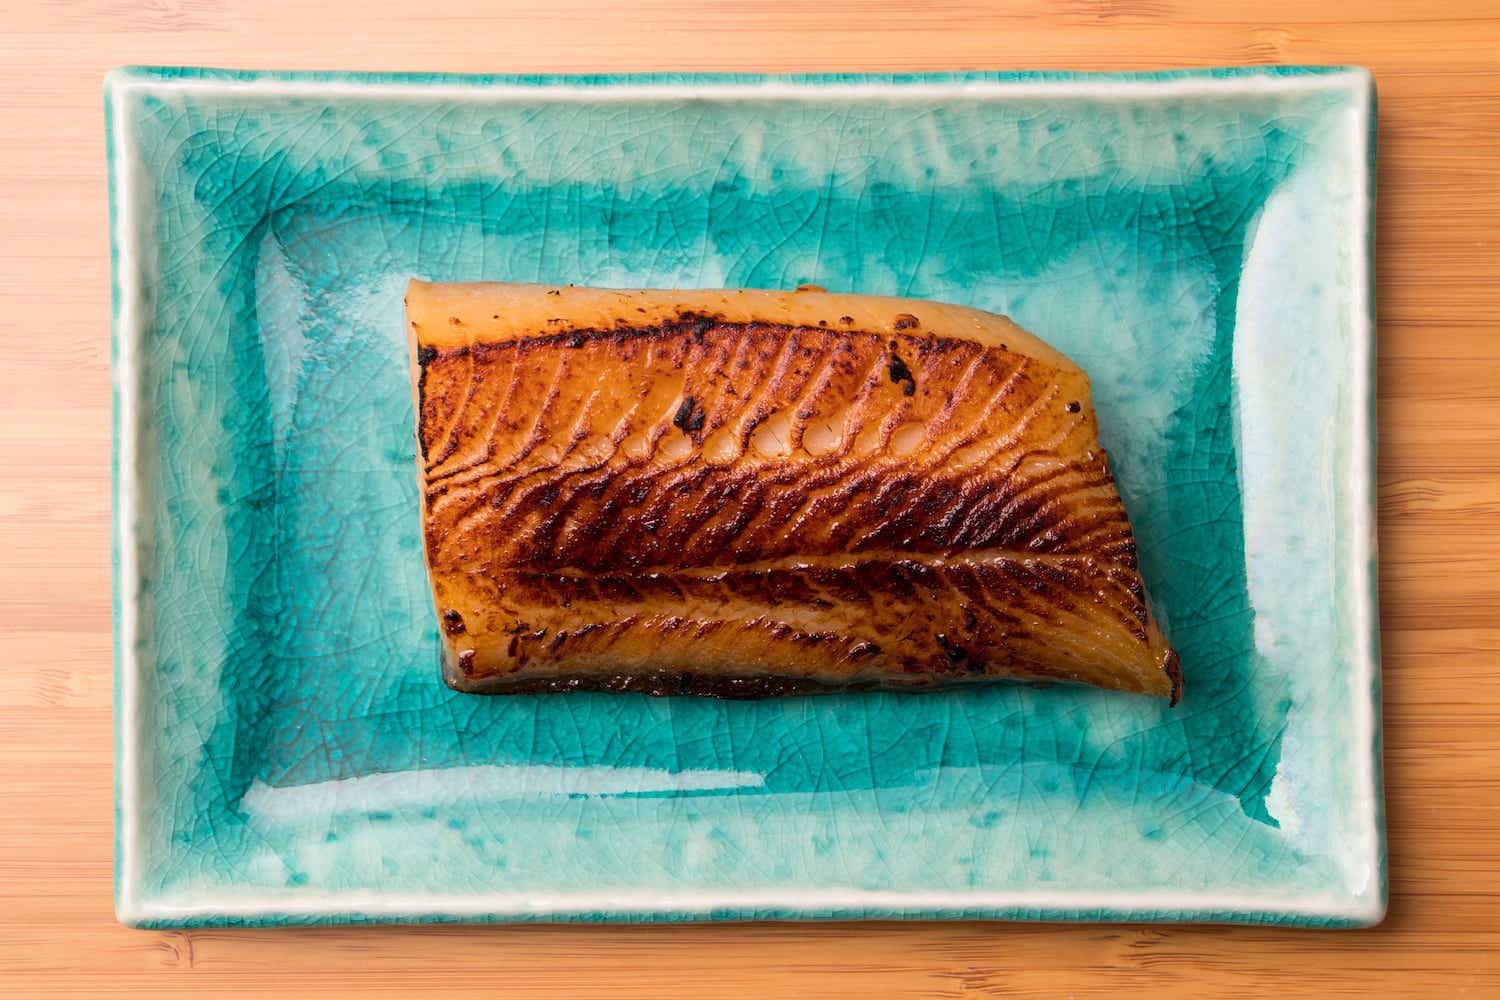
delicious nabe ready to eat
One of the most comforting things to make when the weather turns cold is nabe ryouri (Japanese hotpot cooking). I think of nabe as the opposite and equally satisfying seasonal meal of cold somen in the middle of the summer's heat. In Japan, the common cooking method involves heating broth or water in a clay pot (called donabe) over a portable stove at the table. It wasn't until a few years ago that my fairly narrow concept of nabe was liberated by the book Japanese Hot Pots (Ono & Salat). While the traditional method is lots of fun, we don't necessarily need the special equipment in order to experience delicious nabe cooking. Learning how to improvise is just a matter of understanding the key points, and our reward is freedom to try whatever we want to.
Here are my guidelines:
1. The cooking vessel – a donabe is great, but any large pot or pan works just fine. I use an enameled cast iron pan, which has the advantage of retaining heat after it comes off the stove. A lid is needed.
2. The liquid – homemade dashi is what I use most, but any fish, vegetable, poultry, or meat stock will work. Even using granulated instant dashi or concentrated broth in jars (such as Better Than Bouillon brand) will make good nabe. The main thing to watch is the salt level, knowing that you can always add more later.
3. The ingredients – this is where we want an open and adventurous perspective. Vegetables, fish, tofu, meat, noodles, and anything else in the fridge can be considered. Some things require more time to cook: for example, I will place daikon on the bottom and start cooking before adding fresh greens like shungiku (chrysanthemum leaf) or delicate things like cod fillets. When everything is added to a dry pan before pouring the liquid in, your beautiful arrangement will stay intact during cooking.
4. The shime – meaning to "tie up," the shime is how nabe dining is concluded, with a starch such as rice, noodles, or mochi. After all of the ingredients have been simmered, the delicious broth is most valuable and a neutral flavor vehicle is used to enjoy the broth and make sure we are satisfied. I don't see any good reason to exclude other starches like bread, crackers, potato, pasta, flat breads, beans, or other whole grains.
As an example, here is how I typically do nabe.
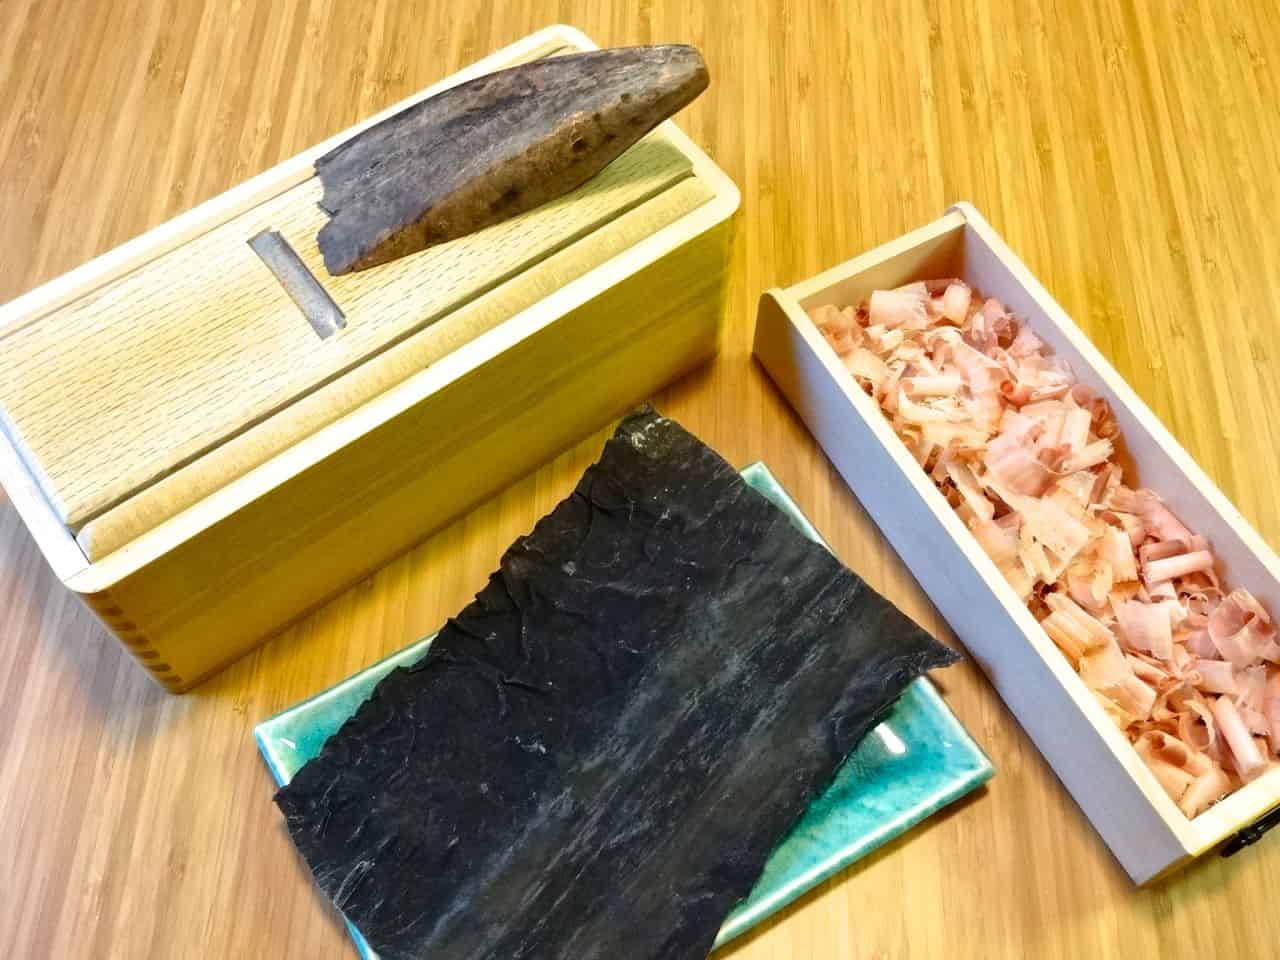
ingredients for classic dashi
First I soak some konbu in 4 cups of cold water (for better flavor extraction and fuller bodied broth) for 30 minutes to several hours depending on my schedule. Then I will shave the katsuobushi while the konbu water heats on the stove. As it comes to a boil, the konbu comes out and the katsuobushi goes in. I let it steep for 10-20 minutes off heat and then strain. To this dashi, I add 1/3 cup usukuchi shoyu and 1/3 cup mirin. These flavorings can be switched out with miso, salt, fish sauce, kimchi, spices, or anything to get the salt level into the appropriate range.
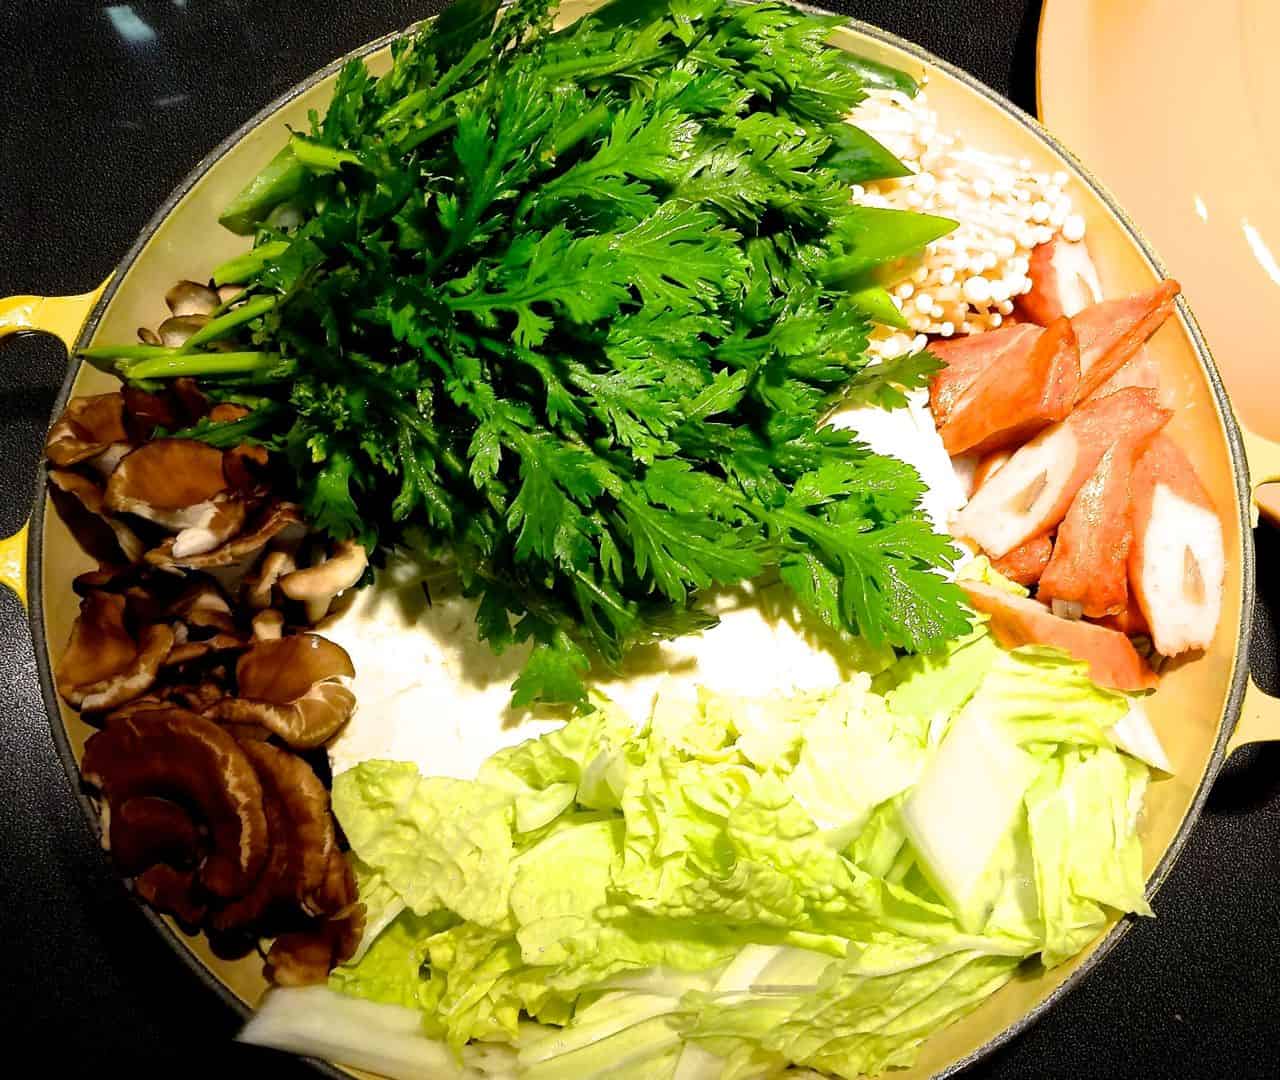
ingredients in the pan before adding liquid
Next, I start cutting and arranging ingredients into the dry pan. Here, I have daikon and dry harusame scattered on the bottom. In the middle is medium firm tofu cut into 2 - 3cm blocks, which is another excellent flavor vehicle when simmered in broth. Around the tofu are enoki and shimeji mushrooms (the more mushroom varieties, the better), hakusai, negi, gobo fish cake, and shungiku. Cutting diagonally helps increase surface area, allowing for better flavor transfer. Because the quality of these ingredients is directly related to how the broth tastes, I tend to be flexible, letting freshness and integrity dictate what goes in rather than what might be 'proper.' In my example, I have several areas covered: oniony negi, meaty mushroom, fish cake richness, and added dimension from roots and greens. The noodles and tofu soak up flavor and provide contrasting texture.

hanging out by the heat vent until the kotatsu is turned on
Once the ingredients are all arranged, I pour the liquid in, cover, and place over high heat. As it starts to bubble, lower the heat and let boil gently until the hardest ingredient is soft enough for your liking (in this case daikon). Then, simply place the whole pot in the center of the table with spoons and chopsticks nearby. The common way to finish is to boil pre-cooked rice in the broth, helping it to break down a bit and absorb flavor. But I usually just combine the rice and broth in a bowl and enjoy. Try both ways to see if the extra step is worth it.
Nabe is really fun, especially when we allow ourselves the freedom to improvise. Keeping in mind these few guidelines not only helps avoid failures, but also provides a structure in which we can exercises our individual creativity. A very experienced performer and teacher once told me that "improvisation is problem solving." That concept took a while for me to understand, but like many things stated simply, I think it makes a lot of sense. For nabe, the 'problems' could involve what's in the fridge, the limitation of the pan size, what kind of shime to use, the dietary preferences or restrictions of the eaters, and so on. Improvising on the solutions is the fun part, and you get a comfort food that is perfect for winter. I think of pizza as another fun theme to improvise on, but that will have to be covered in a future entry.