Chiles two ways - fermented hot sauce & homemade chili powder
2016 fermented hot sauce - 2 cups
I am a big fan of chiles. There are so many varieties and culinary applications, and they add excitement to almost everything. A few years ago I had a habanero plant that produced an unbelievable amount of peppers, which motivated me to learn how to make my own hot sauce. The two styles I experimented with were the vinegar-based and lacto-fermented versions. It's easy to find out your own preferences – look on the label of your favorite hot sauces. Does it contain vinegar, sugar, spices, etc.? My current default hot sauce recipe couldn't be simpler, and any pepper or combination works well. Because we are relying on natural lactic acid bacteria (lactobacillus) for fermentation, fresh and organic chiles will produce the best results.
2016 Fermented Hot Sauce
habanero chiles
cherry bomb chiles
5% cold brine solution (for example, 1000g water & 50g sea salt)
optional - 1 tablespoon brine from sauerkraut or other lacto ferment
1. Remove stem and seeds from chiles, split in half.
2. Stuff into 1 liter canning jar.
3. Pour brine to cover, close lid tightly.
4. Ferment at room temperature 2 – 4 weeks, release pressure every day or so.
5. Drain and reserve brine, puree chiles while adding desired amount of brine.
6. Label and refrigerate.

warning: there are chile fumes during processing

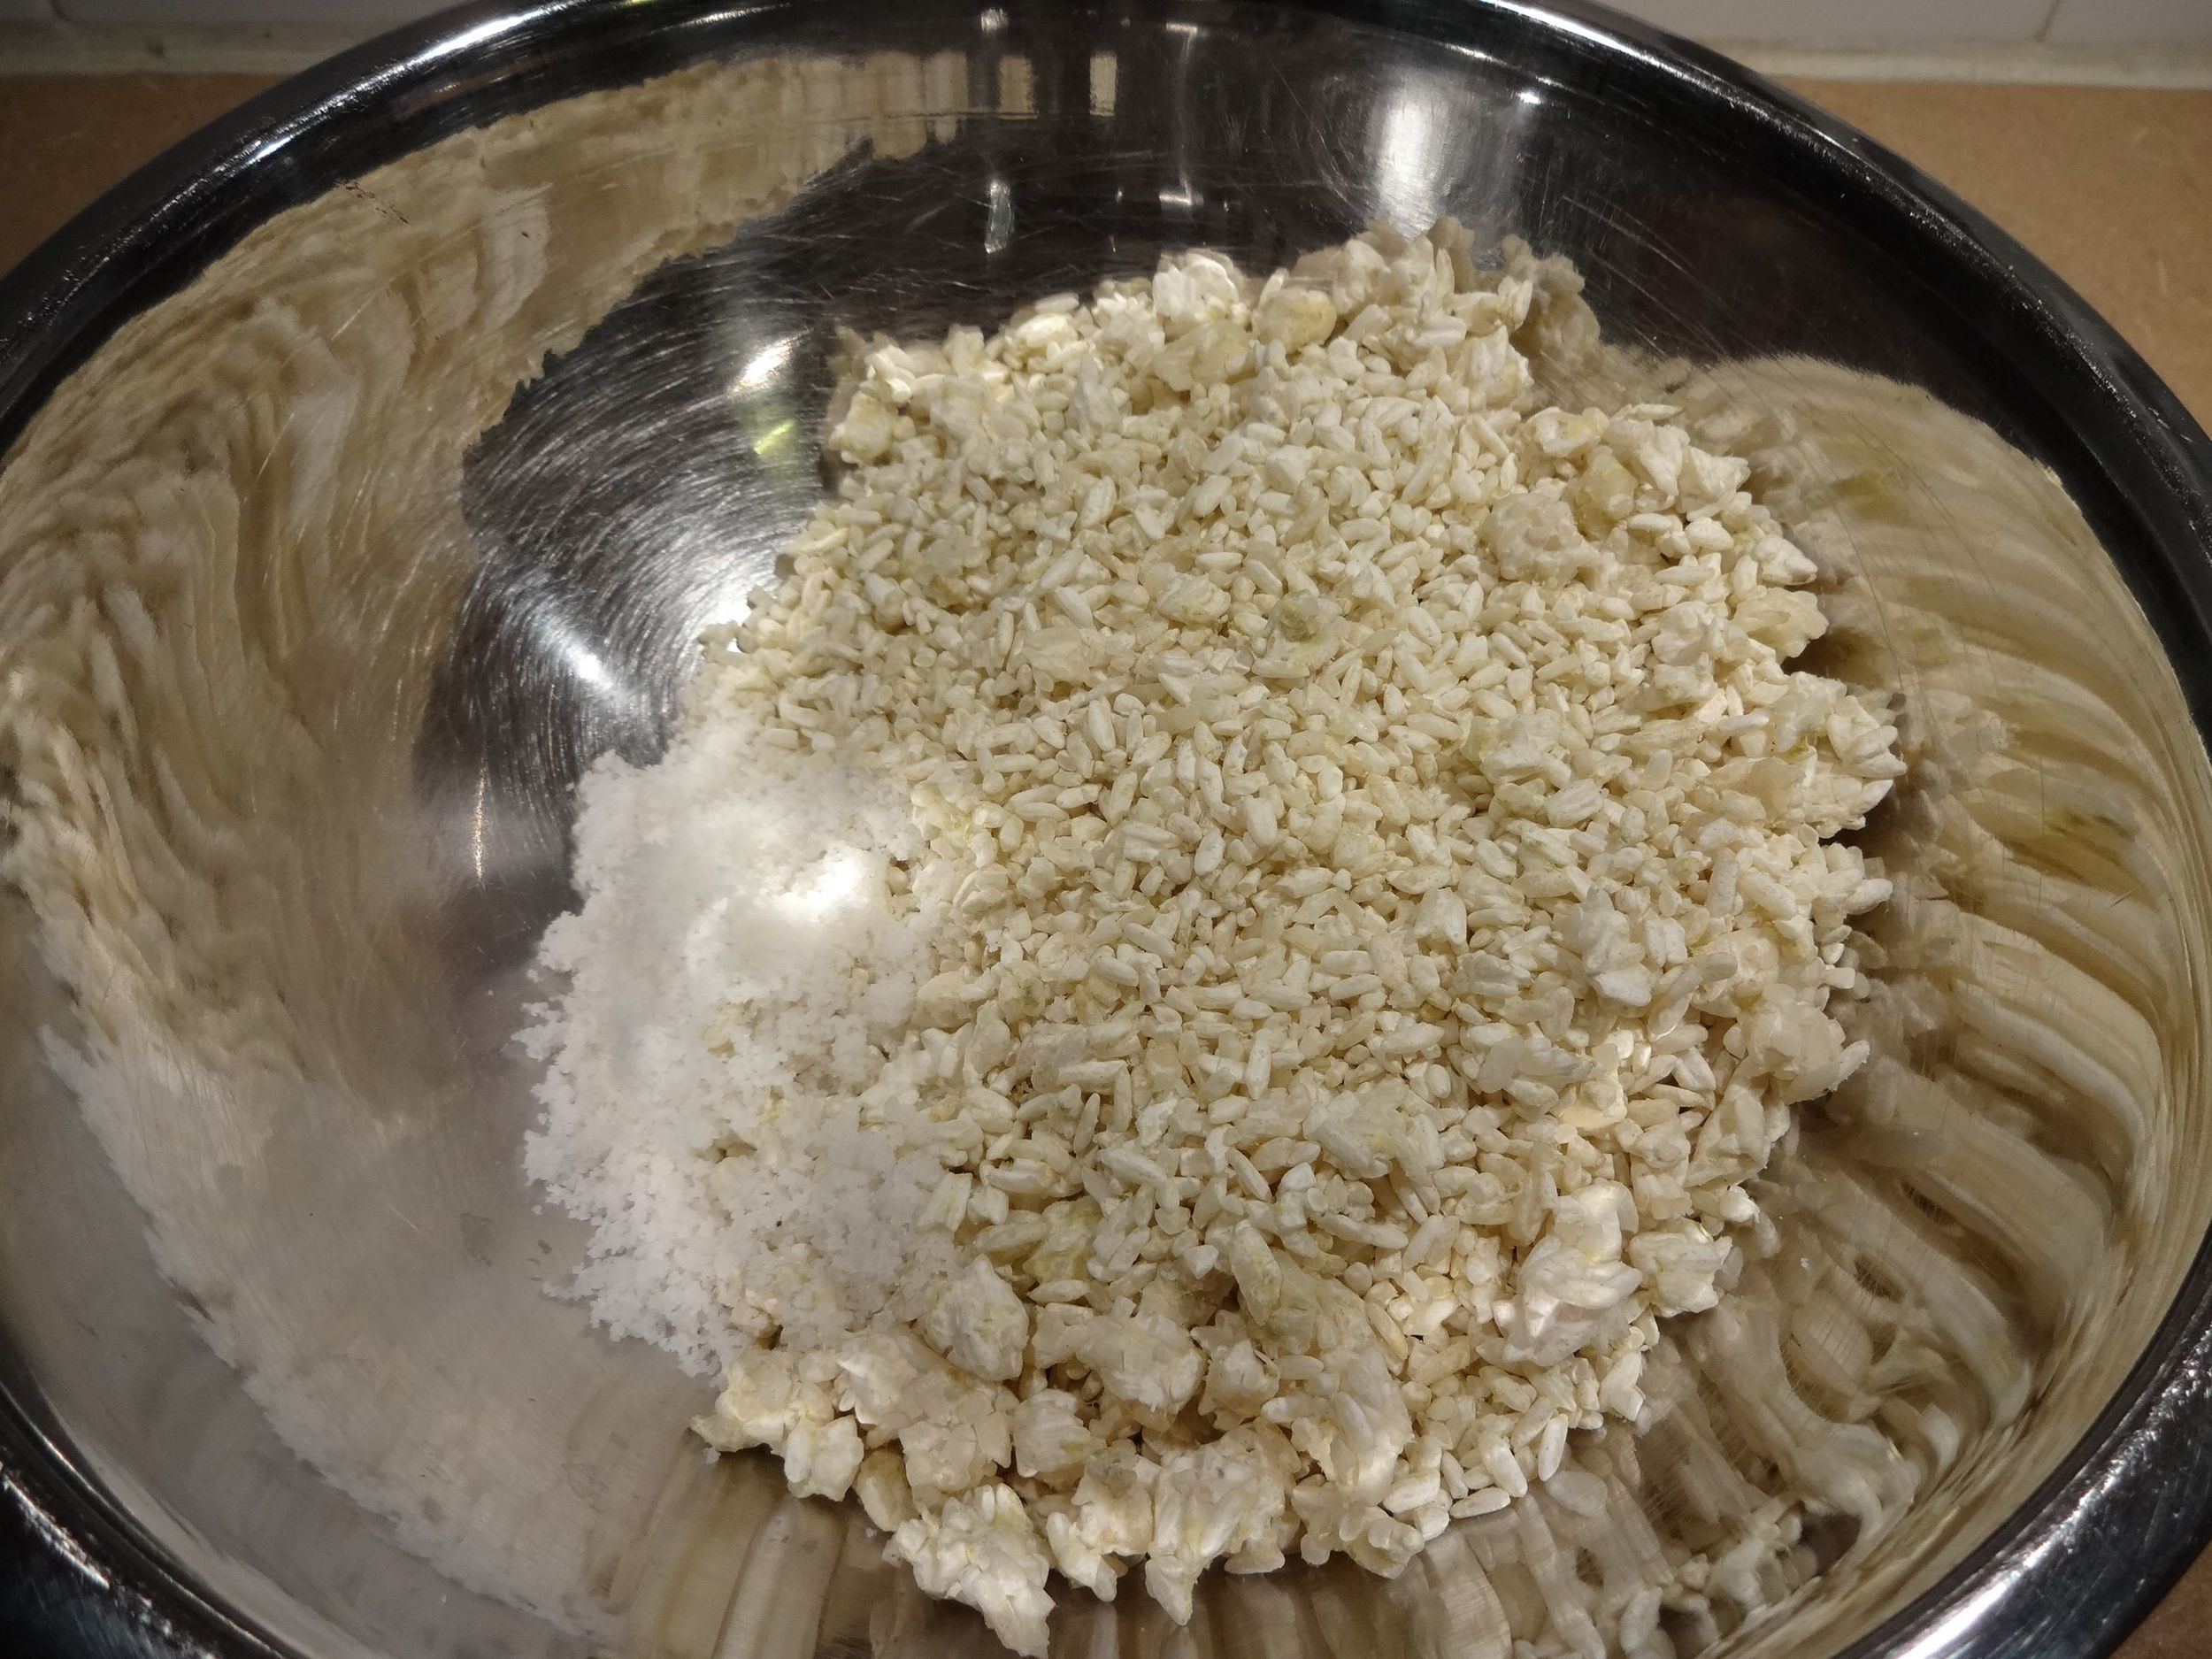
stuff into the jar

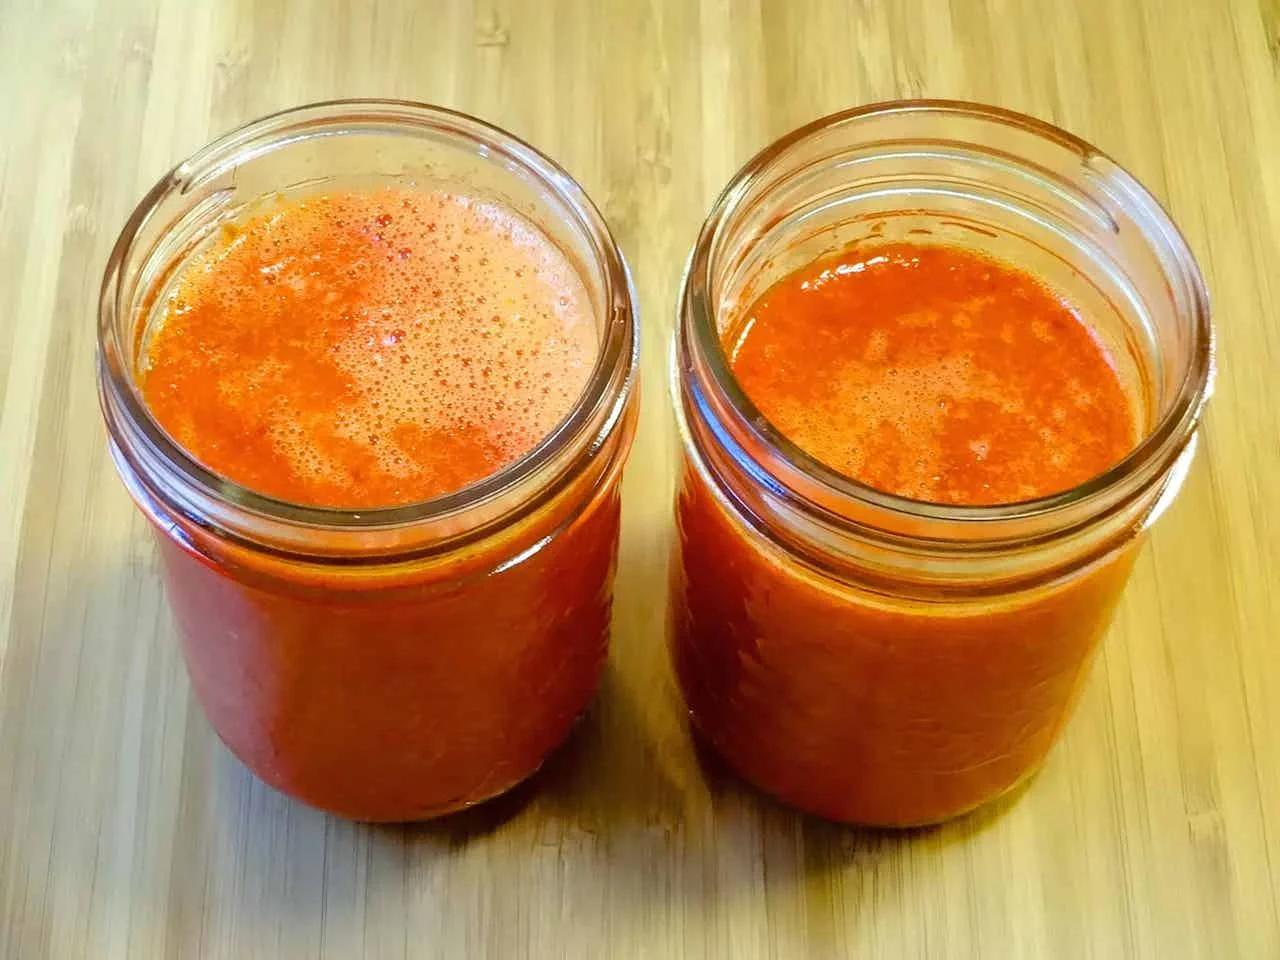
beautiful color, but the brine will turn cloudy in a few days
Here are some tips. Use gloves! You might want to use goggles and a mask. An even better idea is to process the chiles outside. Be careful! I always use filtered water to take out the chlorine, which will help with the fermentation. When the brine turns cloudy, the carbon dioxide (CO2) pressure will build more quickly, so loosen and tighten the lid daily. You can also find various lids and airlock systems to let CO2 out and not introduce oxygen. The fermentation time depends on many factors, but I look for firm sourness of the brine to determine when it’s done. The consistency is controlled by how much brine you use when blending. You can also add other flavorings during this final step.
This sauce is very hot and absolutely delicious. I use it as is, or often mixed 50-50 with Shark brand sriracha, which provides some sweetness and depth. It's also fun to mix with ketchup or mayonnaise, especially if they are also homemade. The sauce will easily last a year or two in the fridge as long as you keep it clean. Read The Art of Fermentation by Sandor Katz for information and inspiration while you wait for the fermentation to complete.

dried whole chiles - dry your own or purchase from a quality store
Homemade Chili Powder
The arrival of winter brings with it the comforting and warming foods like soup, stew, nabe, and various baked things. I really enjoy making my first chili of the season, and learning how to make my own custom chili powder resulted in an unmistakable flavor boost. It's easy and fun to make, but the biggest advantage of home made chili powder is the choice you have regarding what goes into it. And the fresh flavor is unparalleled. For this batch I used cayenne, ancho, casabel, and guajillo chiles, which I got from Penzey's.
The method is simple. Remove the stem and seeds from the chiles and break up into smaller pieces. Toast in a pan (cast iron is best) over medium-low heat, stirring frequently, until fragrant and starting to show wisps of smoke. Allow to cool and grind. I use a clean coffee grinder for bigger batches, but the mortar and pestle works for smaller amounts. At this point you can add herbs and spices to your liking and store in an airtight container. I keep this chili powder simple and add other flavorings during cooking. Remember, chili without cumin is just tomato stew! Toast whole cumin and grind fresh for the best result.

cast iron dutch oven works great for toasting
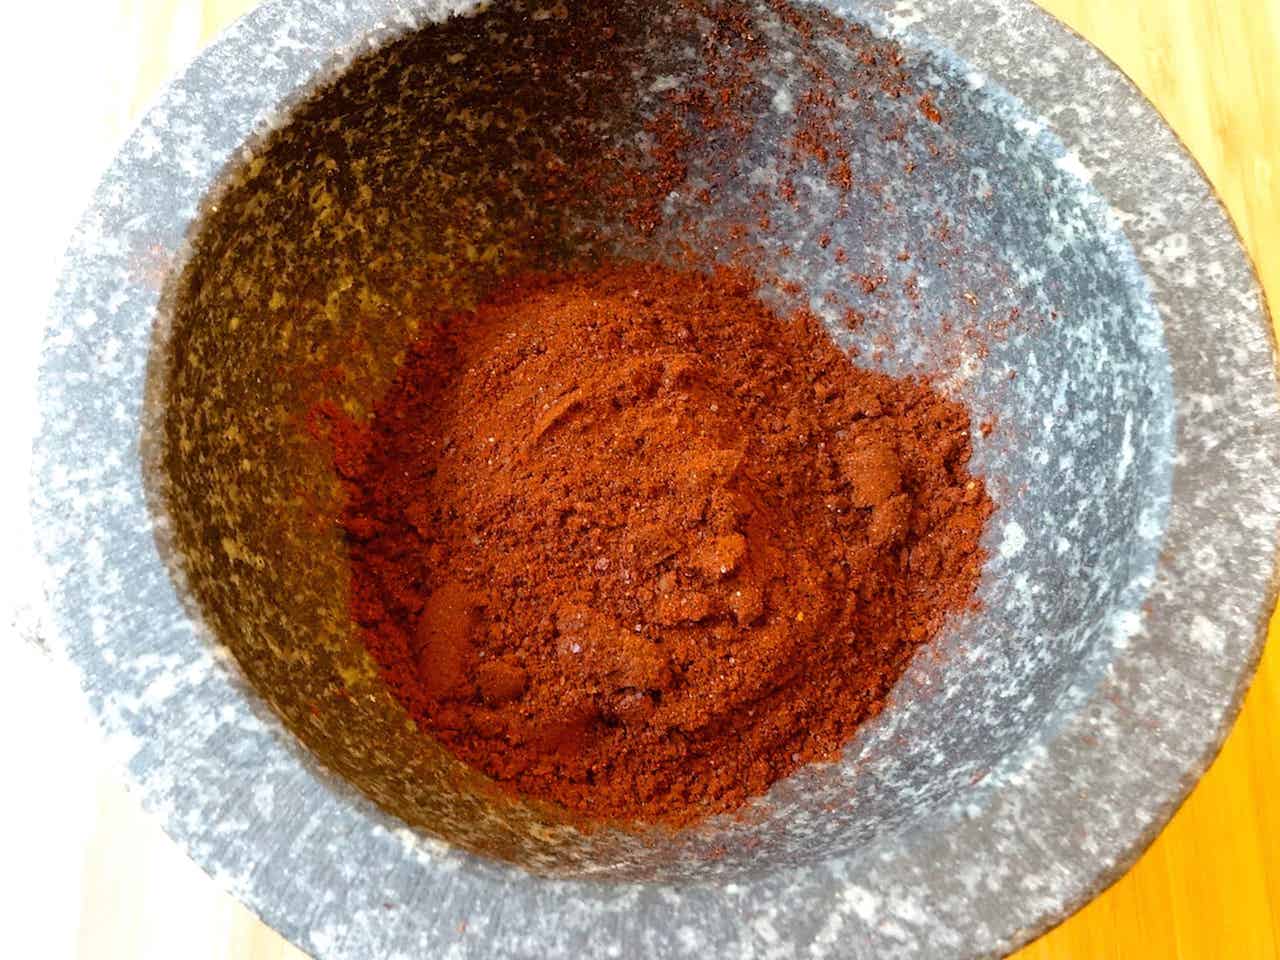
I used a coffee grinder for this batch